Makeup, Beauty, Life.

    Trending This Week

    Recent Posts

    Monday, 8 October 2018

    #31DaysOfHalloween - Week 1

    Hey lovelies! Just a little post about an update on the 31 Days Of Halloween Challenge! For those who don't know, this challenge is popular amongst makeup lovers all over the world! It involves uploading a Halloween inspired makeup look every single day of October, I've been working on my content for this since the start of September and to tell you the truth I've got rid of half of the content I've created because I'm such a perfectionist.

    But here's all the content from Week 1! Including a YouTube tutorial on Day 7's look.

    DAY 1


    DAY 2


    DAY 3


    DAY 4


    DAY 5


    DAY 6


    DAY 7


    There's all the catch up for Week 1! It would mean the world to me if you checked out my first youtube video and if you want to follow my #31DaysOfHalloween challenge this month the link to my Instagram is here. Are you planning on any Halloween inspired looks this year? Have you already done some Let me know in the comments! See you in the next post..

    Rebecca x


    Share:

    MY FIRST YOUTUBE VIDEO

    Hey lovelies! I'm back! This is just a quick post to say that I've just uploaded my first ever YouTube Tutorial! For those who don't know I'm a fully qualified makeup artist, I do appointment, lessons and courses but I've been watching to start YouTube for a long time now. Blog posts are amazing for pretty pictures and creative writing however, when a look requires a lot of explanation and demonstration, I feel like YouTube is a better platform to express my work.

    So my first video ties in with my current #31DaysOfHalloween challenge I have going on, on my Instagram @rebeccacapelmakeup. I'm uploading a Halloween look every single day of October so if you could check it out that would be amazing! 

    Today's video is inspired by a girl I found on Instagram her handle is @simple.symphony, she's absolutely incredibly at what she does and she is a fantastic artist so go and check her out too!

    If you want to see how to get this SFX Football To The Head look then the video is linked down below! If you liked my video and subscribed as well that would mean the absolute world to me x


    See you in my next post!

    Rebecca x
    Share:

    Thursday, 4 October 2018

    THE £6 FOUNDATION - SHOULD YOU BUY IT?

    Hey lovelies! I’m back, this Thursday’s post is SUPER exciting because today we’re talking about a foundation that is £6 - YES £6! If you read my The Ordinary - Affordable Skincare Haul (and if you haven’t, you should) you’ll know that I picked up The Ordinary Coverage Foundation in the process! This foundation was around £6 so I thought I’d give it a go and let you all know my thoughts! 


    So let’s talk FACTS.

    I purchased this foundation from Cult Beauty for £5.95 - bargain! It has 30ml of product (standard foundation size) AND IT COMES WITH A PUMP! We love that. 

    I purchased the shade 3.0 Y Medium Dark which is the perfect shade for me I’m pretty good at guessing my foundation shade online now (I’m NC40 for MAC Studio Fix for reference). However, 21 shades is a bit pathetic in 2018.

    This foundation claims:

    “Formulated from a unique combination of colour pigments suspended in the brand’s proprietary ‘spreadability system’, this full-coverage yet lightweight liquid foundation offers a smooth, perfected, semi-matte finish that lasts all day without settling into fine lines. For an ultra-natural result, it’s available in 21 versatile shades, ranging from very fair to very deep and each classified according to its undertone. ‘P’ shades stand for pink undertones, ‘R’ for red, ‘N’ for neutral and ‘Y’ for yellow, so you can easily identify your perfect match. And, as if you needed further convincing, the formula also offers SPF 15 mineral sun protection, to protect as it perfects your complexion.” - CultBeauty.com

    When I review a foundation I like to apply it the way I apply all my other foundations. 
    • No changes to my skincare
    • No primer
    • No changes to my other face products
    • Worn for a good amount of time at work

    After the first day is when I start to switch things up to see if this changes the performance of the foundation!

    Day 1 - 
    I applied the foundation as normal, my first impressions were amazing! It’s super easy to blend and it does provide a lot of coverage! I would say this is a medium-full coverage I wouldn’t say it is full as I could still see some freckles/imperfections on my skin underneath the foundation. I also noticed that this foundation was a lot more dewy than I expected - I don’t think semi-matte is the right description however I am an oily skin type so this could have contributed. As always I set my t-zone and left the rest of my face.


    (This was 8:30am just after I applied the foundation with no edit or filter to this picture)

    I wore this foundation from 8:30am-11pm so 14.5 hours (I’m just as disgusted as you, but this was a long day at work and by the time I’d got home, had something to eat etc I didn’t get to take my makeup off till 11pm!) 

    Around 6/7pm I started to notice that the foundation was becoming slightly patchy around my forehead&chin area. I never set foundation, only in my T-Zone, and what I realised is that this foundation doesn’t dry down so it felt quite sticky on my face all day. However, for a £5.95 foundation, I thought for it to last this long and only some slight patchiness - this was a good result.

    Day 2 - 
    After Day 1 I was intrigued to see if The Ordinary - Spreadability Fluid Primer would contribute to making the foundation last any longer. I also decided to use a pressed powder to set my whole face rather than just my T-Zone to stop the foundation feeling sticky throughout the day. I wore the foundation from 8am - 6pm, 10 hours. 


    I used a few drops all over my skin but focused the product more in the T-Zone. This makes your skin feel soft and I actually enjoyed using this (for someone who hates primers).

    I then applied the foundation again and did everything the same as before except I set my whole face with pressed powder. The foundation looked & lasted a lot longer than the day before by changing these two aspects of the routine. 

    However, despite setting my whole face with powder, I did still feel like I could feel the stickiness of the foundation on my skin, the foundation itself does feel quite heavy and you feel like you’re wearing a lot of makeup - which is probably because the foundation itself doesn’t dry down. 

    So what are my overall thoughts?

    For the price, I think this is a fantastic foundation. 
    Medium to full coverage, long-lasting and a pump - these are all things which I love about the foundation. However, being an oily skin-type I feel like this was just slightly on the dewy side for me - which probably caused some of the patchiness in my T-Zone, I don’t think this foundation is heavy duty enough for my skin type. I also feel like because the foundation doesn’t dry down, it feels heavy on the skin, you’re very aware that you’re wearing foundation.

    Would I wear it again? Yes.
    Would I wear it for a night out? No.
    Would I wear it in the daytime? Yes. 
    Do I think it is worth the price? Absolutely.
    Is it full coverage? No. 

    I hope this has been an interesting read as we took to pieces The Ordinary - Coverage Foundation. I love testing out new products and letting you all know what I think. If you’re on a budget I think you’ll absolutely love this foundation! I have another affordable foundation review coming this week so keep your eyes peeled! See you soon x


    Rebecca x
    Share:

    Sunday, 30 September 2018

    THE ORDINARY - AFFORDABLE SKINCARE HAUL

    Hello my little lovelies! It's Sunday and I don't know about you, but Sunday are pamper days for me! Face masks, body creams and tucked in bed watching Netflix (I'd take this over a night out ANYDAY!) So it seems only fitting that I post a little skincare haul for you all, that way we can all feel like we're in the Sunday pamper mood!

    On Tuesday night I looked at all my skincare and thought oh my goodness, everything is running out. My toner is low, my eye cream has nearly ran out. In the life of Rebecca Capel - these are dark, dark times. I've recently brought The Ordinary Salicylic Acid Solution back into my skincare routine and I've been loving it. I thought to myself, I'd love to try some more products from this brand! So I hopped on the internet, did some browsing and £77 and 11 products later - I had my skincare haul! I say skincare haul, I did actually order their Coverage Foundation too! So I'll review that in another post coming soon! 


    So on average I spent £7 per product - Which is amazing! The cheapest product was £4.99 and the most 'expensive' was £12.99. I know a lot of you don't like to splurge on skincare so I want to introduce you to a brand that's affordable, but amazing quality. The products are extremely powerful, so if you're using these ingredients for the first time, just let your skin get used to them by gradually introducing them into your skincare routine and always read the directions and warning labels as some of them make your skin more sensitive to UV rays and so you'll need to wear SPF when you incorporate these products into your routine.

    Cult Beauty & Asos stock The Ordinary products round about the same price. Beauty Bay however, sold them for much more expensive? No idea why, just letting you know so you don't end up spending unnecessary coin huns.


    The first product I popped into my basket in the Caffeine Solution 5% + EGCG. I popped this into my basket because my eye cream is running out and I needed a new product for my peepers. Whilst I don't drink a lot of coffee but the thought of putting caffeine on my eyes in something that I can get into. I work long hours, 6/7 days a week. You can imagine my dark circles. Okay so now for all the important stuff.
     *EDIT* I've used this 4 times now and I'm loving it! It actually smells a bit like coffee and you need a tiny drop to cover both eyes, very hydrating and soothing on the eye area.

    Price: £5.99
    Volume: 30ml
    When To Use: AM & PM everyday.
    How To Use: Massage a small amount onto eye contours. Do not rinse.
    What Does It Do?: Reduces eye puffiness & dark circles.
    What's So Good About It? Contains an extremely high concentration of caffeine along with EGCG from green tea leaves to revive and brighten skin around the eyes. Anti-inflammatory and antioxidants provided by this lightweight serum will noticeably improve appearance of eyes.


    Okay my lovelies, product number 2 is the AHA 30% + BHA 2% Peeling Solution. I popped this into my basket because my gal pal and fellow makeup artist Danielle Beaumont Makeup said she used this on her story the other day and the colour of it just intrigued me. I love a good mask and anything which makes me look like I've got baby soft skin - so this was straight in my Cult Beauty Basket! This is one of those products that you need to wear SPF after using as the AHAs increase your skins sensitivity to the sun.

    Price: £6.30
    Volume: 30ml
    When To Use: No more than twice per week, use ideally in the evening.
    How To Use: Apply evenly to clean, dry skin on face & neck using fingertips. leave on for no longer than 10 minutes. Rinse with lukewarm water.
    What Does It Do?: Exfoliates the skin to improve appearance of skins texture & reduce look of fine lines.
    What's So Good About It?: AHAs exfoliate skins top layer for a brighter more even appearance. BHAs exfoliate the skin much more deep to improve pore congestion. Contains Tasmanian pepperberry to reduce inflammation, hyaluronic acid for comfort, vitamin  B5 for healing and black carrot as an antioxidant.


    I was so excited when I saw this on Cult Beauty! I've been wanting to try a new toner for a while now. This is basically a similar product to the Pixi Glow Tonic just 2% stronger and about half the price (no shade because I do love the Pixi Glow Tonic). I'll keep you guys updated with how I feel about this because this is one of the products I'm most excited about! Again this product increases the skins sensitivity to sunlight so make sure you use sun protection my lovelies.
    *EDIT* I looove this! I've used it two nights in a row now after cleansing and it really does make your skin glow! I also find that in the morning my skin isn't as oily and I think it's down to this!

    Price: £6.80
    Volume: 240ml
    When To Use: Use no more than once a day, ideally in the evening. 
    How To Use: After cleansing, saturate a cotton pad with the solution and sweep across face & neck. Avoid the eye contours. Do not rinse. 
    What Does It Do?: A toner that gently exfoliates the skin to improve texture giving the skin a visible boost of radiance & clarity.
    What's So Good About It?: A mild exfoliation product combined with Tasmanian pepperberry to reduce inflammation as well as ginseng root & aloe vera to enhance radiance and offer soothing benefits.


    I don’t want to go into this foundation too much as I want to take it to pieces in it’s own blog post and do a full review for you guys! So that will be coming soon! I attended the James Molloy Masterclass back in May 2018 and he used the Serum Foundation and it looked just beautiful! So when I saw the word COVERAGE you know that it went straight into my Cult Beauty Basket! I was also so intrigued by the price because you can’t get a foundation for £5.95 barely ANYWHERE.

    Price: £5.95
    Volume: 30ml
    How To Use: Shake well before use, smooth on and blend over skin.
    What Does It Do?: Creates a smooth, full coverage, perfected, semi-matte finish that lasts all day without settling into fine lines.
    What's So Good About It?: A unique combination of colour pigments suspended in the "spreadability fluid" to create a full coverage, perfected finish. Offers SPF 15 mineral sun protection.


    I love my oils. Despite having oily skin, they work really well for me! I’ve been wanting to try a Rose Hip Seed Oil product for a while now but I just couldn’t find the right one. So whilst I was adding the whole of Cult Beauty’s The Ordinary stock to my basket I thought I’d throw that in there as well! 

    Price: £9.00
    Volume: 30ml
    When To Use: Once a day, ideally in the evening. After all water based products.
    How To Use: Apply approx. 4 drops and press into skin.
    What Does It Do?: Corrects dark spots, hydrates dry skin, reduces scars, fine lines and encourages cell regeneration.
    What's So Good About It? Packed full of vitamins, antioxidants and essential fatty acids. Rich quantity of omega 3 & 6 as well as vitamin A to target signs of premature ageing from exposure to ultraviolet radiation.


    Vitamin C products can be tricky because it’s such a difficult ingredient to incorperate into a product. But it’s amazing for anti ageing! And you know me, anything anti-ageing is already in my basket ready to be shipped! So this was a product I’m quite excited to try!

    Price: £4.99
    Volume: 30ml
    When To Use: AM or PM
    How To Use: Apply a small amount to the face. A tingling sensation can be expected after application.
    What Does It Do?: Targets uneven skintone & visible signs of ageing, smooth, brightens and plumps complexion.
    What's So Good About It?: Vitamin C is well known for its brightening properties this antioxidant rich formula combined with hyaluronic acid to hydrate & plump skin.


    Another exfoliation serum! My skin is going to be baby soft for sure! I've heard so many good things about this product helping with scarring, which I don't have a lot of but it's always good to have a product on hand whenever you get a blemish, so at least you know there'll be no scarring.

    Price: £5.99
    Volume: 30ml
    How To Use: Apply a few drops and pat into skin, can be diluted with other treatments to reduce strength until skin develops tolerance.
    What Does It Do?: Gently exfoliates skin, reduces pigmentation, diminishes acne scars & age spots and improves skins texture.
    What's So Good About It?: Lactic acid offers a gentle exfoliation whilst Tasmanian pepperberry reduces inflammation & hyaluronic acid improves skins ability to attract and retain moisture.

    100% ORGANIC COLD PRESSED MOROCCAN ARGAN OIL


    If you're an OG reader and you've been reading my blog since 2015 - you'll know that my favourite haircare product is the Mark Hill Miracoilicious Moroccan Argan Oil and it has been FOR YEARS. So when I saw this I was like ooooh because this is cheaper and a higher strength of argan oil so we'll give it a go and see how it goes!
    *EDIT* I've used this once and so far I like it! I used 4 drops throughout the mid-lengths & ends of my hair before blowdrying. My hair feels soft & smooth.

    Price: £5.99
    Volume: 30ml
    How To Use: Skin - Apply a few drops and pat into skin. Hair - Work a few drops into damp hair.
    When To Use: Skin - Once daily or as needed. Hair - When hair is freshly washed & damp before blowdrying.
    What Does It Do?: Reduces flaking and improves skins overall health and adds strength and sheen to hair.
    What's So Good About It?: Packed with vitamins, antioxidants, essential fatty acids, phenols & carotenes.

    HIGH SPREADABILITY FLUID PRIMER


    I hate primers. I really do, I think they're useless. But what I do believe in is skin prep. I love a good hydrating oil or a gel moisturiser under foundation YUMMY. So when I read into this product a little bit, it seemed kind of a primer/skincare hybrid - which might be something I can get along with. I haven't got any hopes because anything with the word primer I avoid like the plague - so we'll see and I'll keep you updated!

    Price: £5.50
    Volume: 30ml
    How To Use: Apply a few drops onto face.
    When To Use: Last step in the skincare routine before makeup
    What Does It Do?: Creates a smooth canvas for makeup
    What's So Good About It?: Free from alcohol, water & oil this silky smooth serum hydrates skin without feeling greasy for a natural dewy look.

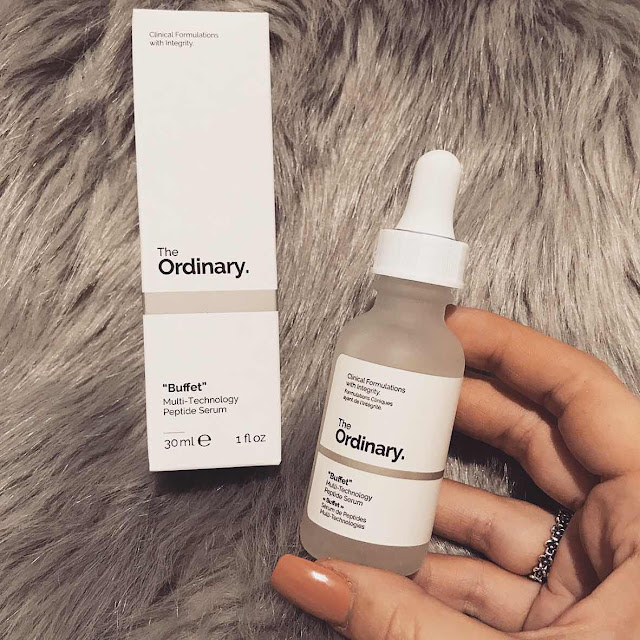
    BUFFET


    Does the word buffet just drag anyone in? I love a good buffet, but a skincare buffet? I'm all for it! Especially when it's an anti-ageing product! I love anything anti-ageing I always say it's better to be proactive than reactive I'm nearly 22 but when I'm 50 I want to look 30 so you can bet that this is one of the products I'm most excited about. It's basically a cocktail for your skin.

    Price: £12.99
    Volume: 30ml
    How To use: Apply a few drops to entire face.
    When  To Use: After cleansing in the am & pm
    What Does It Do?: A powerful all in one treatment that tackles multiple signs of ageing.
    What's So Good About It?: Contains 11 skin friendly amino acids and multiple peptide complexes to stimulate collagen production, diminish fine lines and plump the skin.

    MINERAL UV FILTERS SPF 15 WITH ANTIOXIDANTS


    A lot of the products I've mentioned above, you have to wear SPF whilst using them as they increase your skins sensitivity to the sun. I love having an SPF 15 in my moisturiser anyway just so I have some sun protection (you need it even in the UK guys if you wanna be an anti-ageing queen like me) and this one sounded beautiful and HELLO BLUSH PINK PACKAGING.

    Price: £7.90
    Volume: 50ml
    How To Use: Apply liberally to face.
    When To Use?: 15-20 minutes before sun exposure
    What Does It Do?: Minimises intensity of UV rays on the skin whilst providing hydrating & soothing properties.
    What's So Good About It?: Doesn't contain nanoparticles that penetrate the skin & enter the body. Contains non-pore-blocking silicones, extremely lightweight, bio sugar complex provides short & long term hydration, Tasmanian pepperberry reduces inflammation.

    WOW That's it huns! What a haul! I hope that this post has helped you understand a bit more about these products as I understand that you might look at them and think - well what is it? I'll be trying and testing these skincare products and I'll catch up with you at the end of October/start of November and let you know what's working for me, what isn't and what I'll be recommending to you! I've got some affordable foundation reviews coming up next week so keep your eyes peeled! See you soon hunnies!

    Rebecca x
    Share:

    Thursday, 27 September 2018

    WHY YOUR FOUNDATION ISN’T FLAWLESS

    Hey lovelies! Welcome, welcome, welcome. This Thursday’s post is all about SKIN. There is a HUGE trend of flawless, glowy skin and I am loving it! Unfortunately most of us don’t have goddess skin (does anyone?) so we have to make the most of what we have! I don’t have perfect skin but I like to think that I really look after my skin and I always always always get questions from my clients about how I keep my skin so clear (you’re all so lovely) and it comes down to a lot of things. All of which make the application/appearance of my foundation look a million times better! So I’m gonna share all my little tips with you x

    NUMBER 1 - THE RIGHT FOUNDATION.


    HELLO?! Obviously one of the most important tips for getting flawless foundation is to find the right foundation for your skin. So there are a couple of things you need to figure out first. 

    What’s your skin type? Oily, Dry, Normal or Combination? This will determine what kind of finish (matte, semi matte, dewy etc) will compliment your skin best. For example, my skin type is oily so as you can imagine a dewy foundation on me makes me look like I’ve been for a cardio gym sesh but on dry skin, it looks beautiful!

    What finish do you want? Dewy, Matte, Semi Matte? It depends what type of look you’re going for! If you have dry skin, don’t just jump on the bandwagon and order a super matte foundation that everyone else is buying - chances are you’re going to HATE it. I have oily skin, but I hate how matte foundations make my skin feel! So i always opt for semi matte - I think semi matte foundations are amazing for all skin types because you can adapt your skin prep to suit the foundation. 

    What’s your budget? When it comes to finding the right foundation for you, how much you’re willing to spend is an important factor - some of us wear foundation everyday, some of us wear it once a week! So how much you’re willing to spend definitely comes into the picture. A lot of drugstore brands (such as the likes of Revolution Pro & Maybelline) are coming out with some amazing affordable foundations - just because your budget is lower, doesn’t mean you have to compromise on quality. On the other hand if you wanna splurge on a pricey foundation - you go girl! There’s a foundation out there for everyone.

    What’s your shade? Ahhh shades. This is what annoys me about choosing a foundation. Because there’s always some silly ol’ brand who thinks 20 foundation shades is gonna cut it for everyone! Sorry hun? No. When you’re choosing a foundation, make sure you choose a brand & a product that has a wide shade range because 1. You’re going to find a match as close to your skin as possible and 2. Because we don’t support brands that think anything less than 35 shades is gonna cut it. Go into the shop and have a swatch and a play and don’t be scared to ask for a sample! I’m pretty good at guessing my shade online now but if you need help there’s an amazing website called Findation which you can use if you’re browsing online.

    NUMBER 2 - SIP YOUR SKIN


    I’ve said it before and I’ll say it again. Unfortunately, water & healthy eating contribute to the way your skin looks and in turn, the way your foundation looks. I cannot drill it into you enough that when you start drinking 2 litres of water everyday that your skin will look ABSOLUTELY AMAZING. Have a little faith in me and take this up because I think this is one of the most important steps to making your foundation look flawless. 

    My waterbottle is from HydrateM8 and it’s a 1 litre bottle, I fill it up 2/3 times a day it’s a great help if you’re trying to drink more water as it tracks how much you’re drinking. 

    NUMBER 3 - FEED YOUR SKIN.


    Oh hey healthy living! Hope you like my lil rainbow salad guys, I took this pic from my Slimming World Instagram Account because since I’ve been following a slimming world plan, I’ve been incorperating SO MANY more vegetables & fruits into my diet and this has massively improved the appearance of my skin. Fruits & vegetables contain essential vitamins that keep our skin looking nothing less than amazing.

    Vitamin B increases fatty acids in the skin which promotes exfoliation and firmness and can be found in eggs and vegetables.
    Vitamin C is often referred to as the “building block of collagen” it gives the skin elasticity, tone & structure - you can find vitamin C in citrus fruits, broccoli, bell peppers, berries & tomatoes.
    Vitamin E helps to build & maintain healthy skin tissue and can be found in foods such as leafy greens (kale, cabbage etc), nuts and wholegrains.

    So get eating your veggies girls because you’ve spent your hard earned cash on your new foundation and this is how to make it look better.

    NUMBER 4 - STOP FAKE TANNING YOUR FACE

    PLEASE PLEASE PLEASE I BEG OF YOU. Please stop fake tanning your face. It blocks pores & dehydrates your skin. If you have no fake tan on your face your foundation will apply so much more beautifully, if you have fake tan on your face it can often make your foundation look dry and dull because of the shade of tan underneath and how dry it will be in comparison to your natural skin type. So if you want to look flawless - ditch it! Your skin will thank you later. 

    NUMBER 5 - ARE YOU CLEANSING PROPERLY?


    Are you taking your makeup off properly at night? Do you cleanse again afterwards? Well you should be! I always say to my clients - ditch makeup wipes. They’re hoffiric, they’re bad for your skin. End of. Use a makeup remover/cleansing milk and cotton pads! And keep going until your cotton pads are clean when they sweep over your skin (I mean it - not a single trace of makeup or dirt left on those cotton pads!) That’s how you know you’ve taken your makeup off properly. And then cleanse with a face wash to remove any residue of makeup remover and to actually wash the pores. All of this contributes to your foundation looking better and you might even save some money because you won’t need as much foundation! This step is vital to maintaining amazing skin whilst we're resurfacing it with foundation everyday!

    NUMBER 6 - EXFOLIATION.


    Exfoliating is amazing. We can go from having dull lifeless skin to cheeks that look like GLASS in a matter of minutes. Exfoliate twice a week, once if you’re sensitive. Find a good exfoliator that’s right for you. I love GlamGlow YouthMud however this is very abrasive so I only feel I need it once a week and if you have sensitive skin I wouldn't go for this at all. Decleor Aroma Purete Purifying & Exfoliating Mask is less abrasive and kinder to the skin so I love this one too - it smells so fresh! Once you relieve your skin from all the dead skin cells, your foundation will look so much more radiant and bright and you’ll look younger too!


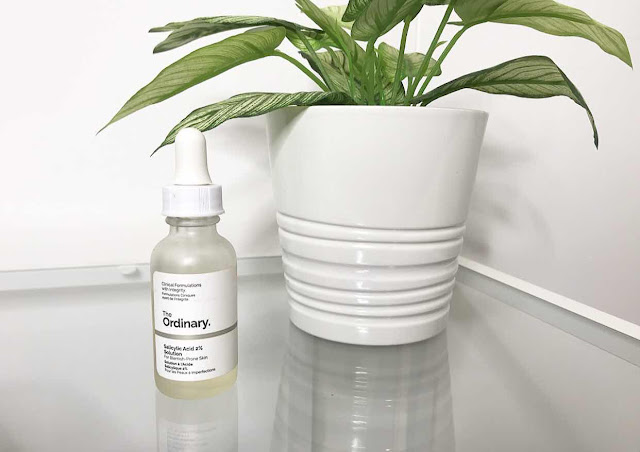
    Another exfoliation product I’ve been using for a while now is The Ordinary Salicylic Acid Solution - I use about 3 drops of this morning and night and what this does essentially is “exfoliates” inside of the pores of your skin, it goes so much deeper than a manual exfoliator and helps to keep my pores clean and unblocked which is helpful if we’re wearing foundation, as makeup can clog pores which can lead to comedones (blackheads) on the skin. Plus this product is DIRT CHEAP. I love it.

    NUMBER 7 - MOISTURE


    Even if you’re oily (like me) you still need to moisturise. Your skin goes through a lot in a day with the weather, air pollution and sun damage (even in the UK) so protecting your skin is a must to make sure you have the best skin for your foundation. Even at night, your needs to be hydrated whilst it's repairing itself whilst you sleep. It’s also important to keep the skin hydrated as when we use cleansers/toners this can sometimes strip the skin of it’s natural oils so we need to put the moisture back in so we get that lovely healthy youthful glow back so our foundation looks flawless! Don’t forget to let your moisturiser sink into the skin before you apply foundation otherwise the foundation will follow the skincare into the pores and they will become blocked!

    NUMBER 8 - STOP USING ILLUMINATORS UNDER YOUR FOUNDATION.


    Okay, I get it. We all love liquid illuminators at the moment! However, I keep seeing this trend of people putting illuminators all over their face before foundation and it is the most hellish thing I’ve ever seen. Illuminators highlight texture. Texture meaning pores, dry skin, flaky skin, spots, blackheads. WHY ARE WE ALL DRAWING ATTENTION TO THE THINGS WE’RE TRYING TO HIDE WITH FOUNDATION!!!!!!!!! A little bit of strobe cream under foundation looks beautiful but all this illuminator business is grinding my gears. Ditch this and swap it for a super hydrating moisturiser and you’ll have skin just as glowy. Then after you’ve applied foundation you can glow yourself up in the areas that you feel you need it.
    I mean who is trying to highlight their whole face? Really?

    NUMBER 9 - GIVE YOUR SKIN SOME LOVE SOMETIME.


    Your skin goes through a lot. It’s so important to look after it in terms of ageing, sun damage, your health & environmental damage but if we look after our skin - our foundation and the rest of our makeup will look so much better! You’re eyeshadow & lipgloss might look absolutely amazing but that only takes up about 20% of your face - the rest is your skin! So if you want to make the most out of that new foundation you’ve just bought then start investing in your skin and the rest will pay off! 

    It’s important to treat your skin, so have a facial once a month, buy the skincare products you love, invest in a new waterbottle! I love the Kiehl’s Midnight Recovery it’s £38 but my god it WORKS whenever my skin feels dull or tired or I’ve been creating looks all day taking my makeup on and off - I use this to rejuvenate my skin. I think of this product as taking my skin out for a nice expensive meal to say sorry for what I’ve put it through. 

    That wraps up today’s post! These are my top tips on how to make your foundation look flawless whatever your budget! And as you may have noticed - it all starts from your skin! What are your favourite skincare products? Or what do you do to make your foundation look flawless? Let me know and I’ll see you in the next post!

    Rebecca x


    Share:

    Sunday, 23 September 2018

    LIPLINERS - ARE WE OVERSPENDING?

    Hey my lovelies! I hope you're doing well, I hope you're having the most wonderful day and I'm about to make your day ten times BETTER.

    Today we're talking lipliners. More specifically, we're talking about the correlation between price & quality of lipliners. You see huns, I went to get a coffee on Thursday morning before heading to my studio and I stumbled into the beauty section in my local Primark (needed to stock up on cotton wool pads 90p for 100 pack just sayin) and whilst I was there I saw a lipliner shade that REALLY caught my eye I was like ok I need that. Next thing I know I've got about 7 in my hand, standard.

    They we're all £1 each, not surprising from Primark but I thought...hmm - what if they're actually good? So I went straight back to my studio (I didn't even get a coffee) because I wanted to try these badboys out. Well, I just couldn't believe it. I swatched them all on my hands and lips, paired them with my favourite lipstick shades and glosses to see what goes with what and I was just BLOWN AWAY.

    This got me thinking, hang on? Don't I have some lipliners in my kit that are over £15...that I never use? Why don't I use them? Why do I always reach for my affordable alternatives? 

    Well that's because in the grand scheme of things, the longevity of lipliner doesn't really matter? All day with our mouths we eat, drink, talk, kiss the list goes on. If our lipstick & gloss comes off, why would we want our lipliner left on? Do you think that when you pay for a lipliner that's £19 it should last all day? Do you even need it to last all day? Even if it DID last all day, wouldn't you just apply said lipliner when you reapply everything else to blend your liner & lipstick together? 

     The longevity of your lipliner doesn't matter, you will probably apply it again anyway! What matters is quality & pigmentation. I CAN'T STAND those lipliners that are stiff & dry - you know the ones that hurt to apply? I live for the creamy pigmented 'glide on' lipliners. I looked in my kit, my creamy, pigmented lipliners - we're the affordable ones. The stiff & dry ones - were the expensive ones. Now I'm not saying that all high end lipliners are rubbish, because they're not. I'm saying - why are we paying over four times the price for a product that will perform almost the same and have the same lifespan in our makeup bags. 

    If you're a makeup artist, you should be sharpening your lipliner between every single client - this is the best way to sanitise lipliners. How many clients do you have on a Saturday? 11? 13? Think how much that lipliner is going to SHRINK in a month. Think about the prices you pay and think about how many times your client has gone out with their fabulous makeup, but they only thing they have to reapply is their lip due to eating, drinking whatever. Why are you paying more for the same product performance?


    Now I can't speak for all affordable lipliners when I say they're good BUT I've found a few affordable brands that sell EXCEPTIONAL quality lipliners, at an amazing price. So, I've done a little bit of swatching of some of my favourite shades and compared them to high end/other affordable options - just so we can do a little compare & contrast! All of the shades of lipliner will be listed underneath each swatch picture! Put your detective cap on and lets investigate.

    (I couldn't find ANY links to the Primark Lip Liners so just pop in your local Primark and have a look for the shades!)


    Top To Bottom (Primark: Toast Lipliner, MAC: Stripdown, NYX: London, Charlotte Tilbury: Iconic Nude.)

    Well look what we have here! NUDE SWATCHES! 

    Primark Toast lipliner is what caught my eye in the shop, totally up my street. When I put this on my lips I thought oh my life this is my new fave. Creamy, pigmented, glides on, no pulling. 

    MAC Stripdown, forever my love, but a lot dryer than the Primark & Tilbury. 

    NYX London, the driest of them all, but an incredible shade and this formula is very comparable to the MAC formula, just a tiny little less pigment. Tugs a little when applying.

    Charlotte Tilbury Iconic Nude, a waxy formula, excellent pigmentation, tends to crumble on the lips after so long.


    Left to Right (Primark: Spice, Laura Mercier: Red Chocolate).
    Now this is interesting. I was drawn to Primark - Spice in the shop. When I arrived back to my studio, I thought wow this is so similar to a Laura Mercier one I have! Except it was more than similar (it was better) and there was a difference of £18!

    Primark Spice - creamy, pigmented, glides on, no tugging.

    Laura Mercier Red Chocolate - Pigmented, slightly dry, slight tugging, ridiculous price in comparison to the Primark one - FOR THE SAME COLOUR AND BETTER FORMULA.


    Left to Right (Primark - Victoria, NYX - Copenhagen, Charlotte Tilbury - Bad Romance)

    Berry Swatches! Now these are all completely different shades, so I can't say that there's a particular "dupe" but you can get a pretty good idea of the quality and price from this. 

    Primark Victoria - Plum shade with reddish undertone, creamy, pigmented, no tugging.

    NYX Copenhagen - Similar to MAC lipliners, drier than Primark, good pigmentation, slight tugging.

    Charlotte Tilbury Bad Romance - Waxy texture, BEAUTIFUL pigmentation and shade, slight tugging, goes a little bit patchy over time with general wear.


    Left to Right (MAC - What a Blast!, NYX - Summer Tease, NYX - Kitten Heels, MAC - Cherry)

    Oranges & Reds. Not the lipliners I get to use most often on my clients - but when I do, it matters. These are just a few of my favourites and you can't just have one red lipliner in your kit, because every red has a different undertone.

    MAC What a Blast! - (Think this is discontinued) This is my favourite lipliner formula from MAC (The Prolongwear Formula) because it's more creamy than the standard ones (but more expensive) I find this formula is the EXACT SAME as the Primark formula and the NYX Slide on Glide on Formula. Thank you, goodbye.

    NYX Summer Tease - this is the ‘slide on, glide on’ style lipliner from NYX which is the formula I prefer more than the others. It’s WAY creamier and you get so much more pigment pay off.

    NYX Kitten Heels - not the best red lipliner, a little dry and tugs a little too but not bad considering he price.

    MAC Cherry - a good red lipliner, pigmented, slightly dry.


    Left to Right (Rimmel - Cappucino, NYX - Sugar Glass, Kilo 402, Kiko 403)

    These are just a few of my favourite nude lipliners that I gravitate most towards during an appointment. They’re reliable, pigmented, smooth, creamy, long lasting and ALL AFFFORDABLE! YAAAY

    Rimmel Cappucino - This is a must-have for your kit, looks beautiful with a super pale nude lip, pigmentation is amazing would just prefer it a little bit more creamier.

    NYX Sugar Glass - part of the ‘Slide on, Glide on’ formula which is actually my favourite NYX lipliner formula. It’s creamier than the suede mattes and the pigmentation is so much better.

    Kiko 402 & 403 - Ahhh Kiko, we love you. I wish I had more spare time to waltz into kiko and add everything to my basket. That brand, is amazing. As are these lipliners! Both classic nudes and again they’re the creamy, pigmented, glide on type!


    Left to Right (Primark - Blush Melba, Primark - Tickle, NYX - Lifes a Beach, Primark - Taupe, Rimmel - Spice)

    Few more nudes here accompanied with some pinks. I rarely get clients asking for anything other than a nude lip, but when you get that question - you need to have GOOD pink/red/dark lipliners at hand. 

    Primark Blush Melba & Tickle - I feel like I’ve sung about these Primark lipliners throughout the whole post, but they’re just that good! These are both perfect pink shades and so extremely pigmented & creamy.

    NYX Life’s a Beach - what an incredible shade, not my fave formula it could be more creamy, good lipliner for the price.

    Primark Taupe - I should have popped this into my nudes category but hey ho! I think this was one of the lipliners I didn’t even know I was picking up but I feel like this is one that I’ll get a lot of use from! I’m not going to talk about how much I love this formula any more!

    Rimmel Spice - Pigmented, could be slightly more creamy, tuggs a little but amazing lipliner for the price.

    Okay my lovelies that wraps up today’s post! My favourite formulas are 100% the Primark, Kiko & NYX Slide on Glide on! They’re so affordable and the quality is second to none! I hope this makes you feel differently about lipliners and hey - if you can get 19 lipliners for £19 instead of 1 lipliner for £19, whos the winner? I hope this was helpful to any aspiring mua’s as it’s tips like this that will really help you build your kit up with more affordable products without compromising on quality! And if you just love lipliner - I hope I’ve found you a bargain! Leave me a comment down below about your favourite lipliners and favourite affordable products! See you soon x

    Rebecca x

    Share:

    Wednesday, 19 September 2018

    HOW TO CLEAN STRIP LASHES (WITHOUT DAMAGE)

    Hey lovelies! I’m back! Today’s post is all about how to clean your strip lashes! As my clients will know, everytime you visit me for a makeup appointment - you receive some amazing quality strip lashes that can be used up to 20 times post appointment. But it’s important to keep your lashes clean so there is no bacteria/glue build up which could get in your eyes and cause all sorts of nasty things!

    If you clean your lashes properly and carefully they can last you for weeks! Which saves you money in the long run! So it doesn’t matter if you’ve been crying/dancing/sweating this tip will restore your lashes back to how they were when you first bought them! 

    The lashes I’ll be cleaning today are my Yazmae Cosmetics Lashes in the styles “Dubai” & “London” Yazmae are my favourite lash brand their quality is exceptional and they have an amazing makeup artist discount!


    For this you will need:
    Lashes 
    Tweezers
    Fairy Liquid
    A small bowl
    A clean mascara wand
    A towel
    Kitchen roll

    STEP 1 - REMOVING THE GLUE.


    I’ve been using my lashes whilst I’m creating content for 31 Days of Halloween - this particular pair is covered in lash glue and face paints - nice! So the first thing to do is carefully remove any glue from the band of the lash with tweezers. Becareful to only pinch the glue and not the band to avoid pulling out any lashes.

    STEP 2 - PREP CLEANING SOLUTION.


    The cleaning solution we’ll be using to clean our lashes with is a Fairy Liquid & Warm Water combo! Use a teaspoon of Fairy Liquid in a clean bowl and add warm (not hot) water.

    Fairy Liquid has antibacterial properties which will elimate any bacteria sitting on the lashes and it was also help to soak off any excess glue that was too difficult to remove with the tweezers.

    STEP 3 - SOAK.


    Soak your lashes in the solution for around 20 minutes. By the end of the 20 minutes you’ll be able to see all the glue that you couldn’t remove with the tweezers floating around in the solution. Try not to touch the lashes whilst they are in the solution - this is when they’re most fragile. Leave them to have a nice warm soak!

    STEP 4 - REMOVE THE LASHES.


    Carefully remove the lashes from the solution with tweezers and place them on some kitchen roll. As you can see, there is lots of build up and glue that has been soaked off the lashes! Again, try not to touch the lashes as they’re fragile whilst wet.

    STEP 5 - RINSE.


    Remove all the solution from your small bowl and fill it with clean cold water. The lashes will have a lot of residue on them from the cleaning solution so it’s important to rinse this off! Place the lashes in the cold water and leave them to soak for around 3-5 minutes.

    STEP 6 - DRYING 


    Remove the lashes from the cold water and pop them on some kitchen roll to dry - they should dry within around 10 minutes! Don’t try to change the shape of them or touch them. Leave them to dry how they are!

    STEP 7 - COMBING THE LASHES.


    When the lashes are completely dry, use a clean mascara wand or spoolie, to comb through the lashes. This will reshape them back to how they were when you bought them and will seperate the lashes to get them looking nice and fluffy again!

    STEP 8 - STORAGE.


    Pop your lashes back in their original case to keep them safe and clean. You can even clean the inside of your lash case using an antibacterial wipe (but that’s just me being a germ freak) and they’re ready to use next time you want amazing lashes! 

    I hope you found this post useful and if you do clean your lashes this way make sure you send me your process and befores and afters - I’d love to see your lovely clean lashes! Leave a comment below with your fave lash brands & how you like to clean your lashes! See you in my next post!

    Rebecca x
    Personal Instagram: @rebeccacapel
    Business Instagram: @rebeccacapelmakeup
    Slimming World Instagram: @swukbecca
    Share:

    Enter your email address:

    Delivered by FeedBurner

    Related Posts Plugin for WordPress, Blogger...
    Blog Design Created by pipdig